How to get a MARC account: Difference between revisions
Jump to navigation
Jump to search
No edit summary |
No edit summary |
||
| Line 6: | Line 6: | ||
== Procedure == | == Procedure == | ||
# Navigate to the IT Homepage: www.ucalgary.ca/it | |||
# Click Login in the upper right corner | |||
# Click "Order Something" | |||
# Click "Research Computing" | |||
# Click "Medical Advanced Research Computing (MARC)" | |||
# Select "Add Access" from the "What would you like to do?" box | |||
# Choose your SCDS share from the next box | |||
# Type a synopsis of the work you plan to do into the "Business Reason" box. | |||
# You may leave the Additional Information box empty | |||
# Someone should reply to you when your account is ready. | |||
= Logging in to MARC = | = Logging in to MARC = | ||
== Prerequisites == | == Prerequisites == | ||
# An account will be created on the RDH (Research Data Haven) system for you. This is where you will run the SSH client Putty from. The RDH is a Citrix system and is somewhat like a remote desktop as you only see images of the application (Putty) being run. | |||
# You will also need a SecurID to access the RDH. | |||
# VPN is NOT required but is acceptable when accessing RDH. | |||
== Procedure == | == Procedure == | ||
=== Login to securesf === | |||
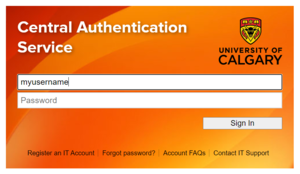
[[File:RdhLoginScreen.png|thumb|center|Image of the RDH (Research Data Haven) login screen.]] | # Point your browser to https://securesf.ucalgary.ca [[File:RdhLoginScreen.png|thumb|center|Image of the RDH (Research Data Haven) login screen.]] | ||
# Enter your User Name. Use your UC domain credentials without the UC\ in front. (eg. jsmith) | |||
# For Password 1 – enter your password associated with the UC domain account. | |||
# For Password 2 – enter your SecurID password followed by the number on the SecurID. '''There are no spaces or backslash (\)'''. | |||
# Click the Log On button. | |||
=== Add Applications === | |||
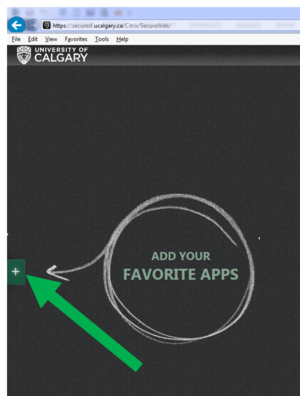
# Once you have logged into securesf click the "+" on the left side of the screen as shown with the green arrow below [[File:RdhAddApps.png|thumb|center]] | |||
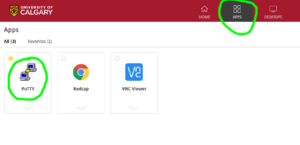
# Add Putty as an available app by clicking "Linux Utilities", "Putty" [[File:RdhAddPutty.png|thumb|center]] | |||
# Click the Putty icon in the middle of the browser window. This will start the Putty application. You will get a | |||
Revision as of 22:19, 15 April 2020
This page describes the process of obtaining an account and how to login to the Marc Cluster. If you are looking for information about the MARC cluster hardware, please see the Marc_Cluster_Guide.
Obtaining an Account
Prerequisites
- Access will only be granted to MARC for those with project shares on SCDS as this is the only to get data into MARC.
Procedure
- Navigate to the IT Homepage: www.ucalgary.ca/it
- Click Login in the upper right corner
- Click "Order Something"
- Click "Research Computing"
- Click "Medical Advanced Research Computing (MARC)"
- Select "Add Access" from the "What would you like to do?" box
- Choose your SCDS share from the next box
- Type a synopsis of the work you plan to do into the "Business Reason" box.
- You may leave the Additional Information box empty
- Someone should reply to you when your account is ready.
Logging in to MARC
Prerequisites
- An account will be created on the RDH (Research Data Haven) system for you. This is where you will run the SSH client Putty from. The RDH is a Citrix system and is somewhat like a remote desktop as you only see images of the application (Putty) being run.
- You will also need a SecurID to access the RDH.
- VPN is NOT required but is acceptable when accessing RDH.
Procedure
Login to securesf
- Point your browser to https://securesf.ucalgary.ca

Image of the RDH (Research Data Haven) login screen. - Enter your User Name. Use your UC domain credentials without the UC\ in front. (eg. jsmith)
- For Password 1 – enter your password associated with the UC domain account.
- For Password 2 – enter your SecurID password followed by the number on the SecurID. There are no spaces or backslash (\).
- Click the Log On button.

